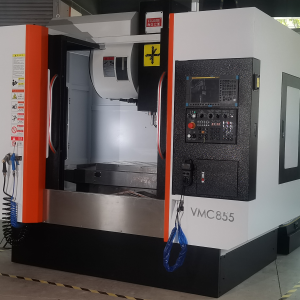
On the stage of today’s manufacturing industry, CNC machine tools have become the backbone of production with their efficient and accurate processing capabilities. The machining accuracy requirements for key parts of typical CNC machine tools are undoubtedly the core elements that determine the choice of precision level CNC machine tools.
CNC machine tools are classified into different categories such as simple, fully functional, and ultra precision due to their diverse uses, and their accuracy levels vary greatly. Simple CNC machine tools still occupy a place in the current field of lathes and milling machines, with a minimum motion resolution of 0.01mm, and motion and machining accuracy generally ranging from 0.03 to 0.05 mm or above. Although the accuracy is relatively limited, in some machining scenarios where precision requirements are not extremely strict, simple CNC machine tools play an irreplaceable role due to their economic benefits and easy operation.
In sharp contrast, ultra precision CNC machine tools are designed specifically for special machining needs, with an accuracy of astonishing 0.001mm or less. Ultra precision CNC machine tools are often used in high-precision and cutting-edge fields such as aerospace and medical equipment, providing solid technical support for manufacturing extremely complex and precision demanding components.
From the perspective of accuracy, CNC machine tools can be further divided into ordinary and precision types. Usually, there are 20 to 30 accuracy inspection items for CNC machine tools, but the most critical and representative ones are single axis positioning accuracy, single axis repeated positioning accuracy, and roundness of the test piece produced by two or more linked machining axes.
The positioning accuracy and repeated positioning accuracy complement each other and together outline the comprehensive accuracy profile of the moving components of the machine tool axis. Especially in terms of repeated positioning accuracy, it is like a mirror, clearly reflecting the positioning stability of the axis at any positioning point within its stroke. This characteristic becomes the cornerstone for measuring whether the shaft can work stably and reliably, and is crucial for ensuring the long-term stable operation of the machine tool and the consistency of machining quality.
Today’s CNC system software is like a smart craftsman, with rich and diverse error compensation functions, able to cleverly compensate for the system errors generated in each link of the feed transmission chain accurately and stably. Taking the various links of the transmission chain as an example, the changes in factors such as clearance, elastic deformation, and contact stiffness are not constant, but exhibit dynamic instantaneous momentum changes with variables such as the size of the workbench load, the length of movement distance, and the speed of movement positioning.
In some open-loop and semi closed-loop feed servo systems, the mechanical driving components after the measuring components are like ships moving forward in wind and rain, subject to various accidental factors. For example, the phenomenon of thermal elongation of ball screws can cause drift in the actual positioning position of the workbench, thereby bringing significant random errors to machining accuracy. In summary, if there is a good choice in the selection process, there is no doubt that the equipment with the most excellent repeated positioning accuracy should be prioritized, adding a strong insurance to the processing quality.
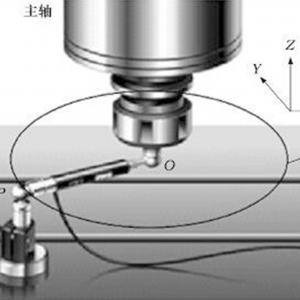
The precision of milling cylindrical surfaces or milling spatial spiral grooves (threads), like a fine ruler for measuring the performance of a machine tool, is a key indicator for comprehensively evaluating the servo following motion characteristics of the CNC axis (two or three axes) and the interpolation function of the CNC system of the machine tool. The effective method to determine this indicator is to measure the roundness of the processed cylindrical surface.
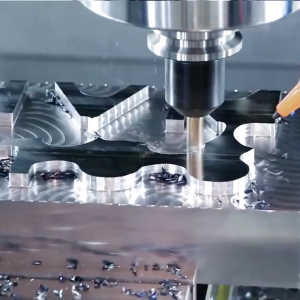
In the practice of cutting test pieces on CNC machine tools, the milling oblique square four sided machining method also demonstrates its unique value, which can accurately judge the accuracy performance of two controllable axes in linear interpolation motion. When performing this trial cutting operation, it is necessary to carefully install the end mill used for precision machining onto the machine spindle, and then perform meticulous milling on the circular specimen placed on the workbench. For small and medium-sized machine tools, the size of the circular specimen is usually selected between ¥ 200 and ¥ 300. This range has been tested in practice and can effectively evaluate the machining accuracy of the machine tool.
After completing the milling, carefully place the cut specimen on a roundness meter and measure the roundness of its machined surface using a precision measuring instrument. In this process, it is necessary to observe and analyze the measurement results sensitively. If there are obvious milling cutter vibration patterns on the milled cylindrical surface, it warns us that the interpolation speed of the machine tool may be unstable; If the roundness produced by milling shows obvious elliptical errors, it often reflects that the gains of the two controllable axis systems in interpolation motion have not been well matched; When there are stop marks on each controllable axis movement direction change point on a circular surface (i.e., in continuous cutting motion, stopping the feed motion at a certain position will form a small segment of metal cutting marks on the machining surface), this means that the forward and reverse clearance of the axis has not been adjusted to the ideal state.
The concept of single axis positioning accuracy refers to the error range generated when positioning any point within the axis stroke. It is like a lighthouse, directly illuminating the machining accuracy ability of the machine tool, and thus undoubtedly becoming one of the most critical technical indicators of CNC machine tools.
Currently, there are certain differences in the regulations, definitions, measurement methods, and data processing methods of single axis positioning accuracy among countries worldwide. In the introduction of a wide variety of CNC machine tool sample data, common and widely cited standards include the American Standard (NAS), recommended standards by the American Machine Tool Manufacturers Association, German Standard (VDI), Japanese Standard (JIS), International Organization for Standardization (ISO), and Chinese National Standard (GB).
Among these dazzling standards, Japanese standards are relatively lenient in terms of regulations. The measurement method is based on a single set of stable data, and then cleverly uses ± values to compress the error value by half. As a result, the positioning accuracy obtained using Japanese standard measurement methods often differs by more than twice compared to other standards.
Although other standards differ in the way they process data, they are deeply rooted in the soil of error statistics to analyze and measure positioning accuracy. Specifically, for a certain positioning point error in a controllable axis stroke of a CNC machine tool, it should be able to reflect the possible errors that may occur during thousands of positioning times during the long-term use of the machine tool in the future. However, limited by actual conditions, we often can only perform a limited number of operations during measurement, usually 5 to 7 times.
The accuracy judgment of CNC machine tools is like a challenging puzzle solving journey, not achieved overnight. Some accuracy indicators require careful inspection and analysis of the processed products after the actual machining operation of the machine tool, which undoubtedly increases the difficulty and complexity of accuracy judgment.
In order to ensure the selection of CNC machine tools that meet production needs, we need to deeply explore the accuracy parameters of the machine tools and conduct a comprehensive and detailed analysis before making procurement decisions. At the same time, it is crucial to have sufficient and in-depth communication and exchange with CNC machine tool manufacturers. Understanding the manufacturer’s production process level, the rigor of quality control measures, and the completeness of after-sales service can provide more valuable reference basis for our decision-making.
In practical application scenarios, the type and accuracy level of CNC machine tools should also be scientifically and reasonably selected based on specific machining tasks and precision requirements of parts. For parts with extremely high precision requirements, machine tools equipped with advanced CNC systems and high-precision components should be given priority consideration without hesitation. This choice not only ensures excellent processing quality, but also improves production efficiency, reduces scrap rates, and brings higher economic benefits to the enterprise.
In addition, regular precision testing and meticulous maintenance of CNC machine tools are key measures to ensure long-term stable operation and maintain high-precision machining capabilities. By promptly identifying and resolving potential accuracy issues, the service life of machine tools can be effectively extended, ensuring the stability and reliability of machining quality. Just like taking care of a precious racing car, only continuous attention and maintenance can keep it performing well on the track.
In summary, the accuracy of CNC machine tools is a multidimensional and comprehensive consideration index, which runs through the entire process of machine tool design and development, manufacturing and assembly, installation and debugging, as well as daily use and maintenance. Only by comprehensively understanding and mastering relevant knowledge and technology can we wisely choose the most suitable CNC machine tool in actual production activities, fully tap into its potential efficiency, and inject strong power and support into the vigorous development of the manufacturing industry.
