Deep analysis of precision level and machining accuracy requirements for key parts of CNC machine tools
In modern manufacturing, CNC machine tools have become the core equipment for producing various precision parts with their high precision, high efficiency, and high degree of automation. The accuracy level of CNC machine tools directly determines the quality and complexity of the parts they can process, and the machining accuracy requirements for key parts of typical parts play a decisive role in the selection of CNC machine tools.
CNC machine tools can be classified into various types based on their usage, including simple, fully functional, ultra precision, etc. Each type can achieve different levels of accuracy. Simple CNC machine tools are still used in some lathes and milling machines, with a minimum motion resolution of 0.01mm, and motion and machining accuracy usually above (0.03-0.05) mm. This type of machine tool is suitable for some machining tasks with relatively low precision requirements.
Ultra precision CNC machine tools are mainly used in special machining fields, and their accuracy can reach astonishing levels below 0.001mm. This ultra-high precision machine tool can manufacture extremely precise parts, meeting the strict requirements of high-precision and cutting-edge industries such as aerospace and medical equipment.
In addition to classification by purpose, CNC machine tools can also be classified into ordinary and precision types based on accuracy. When testing the accuracy of CNC machine tools, it usually involves 20-30 items. However, the most representative and characteristic items mainly include single axis positioning accuracy, single axis repeated positioning accuracy, and roundness of the test piece produced by two or more linked machining axes.
Single axis positioning accuracy refers to the error range when positioning any point within the axis stroke, and it is a key indicator that directly reflects the machining accuracy capability of the machine tool. At present, there are certain differences in the regulations, definitions, measurement methods, and data processing methods of this indicator among countries around the world. In the introduction of sample data for various types of CNC machine tools, common standards include the American Standard (NAS), the recommended standards of the American Machine Tool Manufacturers Association, the German Standard (VDI), the Japanese Standard (JIS), the International Organization for Standardization (ISO), and China’s National Standard (GB).
It should be noted that among these standards, the Japanese standard specifies the lowest. The measurement method is based on a single set of stable data, and then the error value is compressed by half by taking a ± value. Therefore, the positioning accuracy measured using Japanese standard measurement methods often differs by more than twice compared to results measured using other standards. However, other standards, although different in data processing, all follow the law of error statistics to analyze measurement and positioning accuracy. This means that for a certain positioning point error in a controllable axis stroke of a CNC machine tool, it should reflect the error situation of thousands of positioning times during long-term use of the machine tool. However, in actual measurement, due to limitations in conditions, only a limited number of measurements can be made (usually 5-7 times).
The single axis repeated positioning accuracy comprehensively reflects the comprehensive accuracy of each moving component of the axis, especially for reflecting the positioning stability of the axis at any positioning point within the stroke, which is of great significance. It is a basic indicator to measure whether the axis can work stably and reliably. In modern CNC systems, software usually has rich error compensation functions, which can stably compensate for the system errors of each link on the feed transmission chain.
For example, the clearance, elastic deformation, and contact stiffness of each link in the transmission chain will exhibit different instantaneous movements depending on factors such as the load size of the workbench, the length of the movement distance, and the speed of the movement positioning. In some open-loop and semi closed-loop feed servo systems, the mechanical driving components after measuring the components will be affected by various accidental factors, resulting in significant random errors. For example, thermal elongation of ball screws may cause drift in the actual positioning position of the workbench.
In order to comprehensively evaluate the accuracy performance of CNC machine tools, in addition to the single axis accuracy indicators mentioned above, it is also crucial to evaluate the accuracy of multi axis linkage machining. The precision of milling cylindrical surfaces or milling spatial spiral grooves (threads) is an indicator that can comprehensively evaluate the servo following motion characteristics of CNC axes (two or three axes) and the interpolation function of CNC systems in machine tools. The usual method of judgment is to measure the roundness of the machined cylindrical surface.
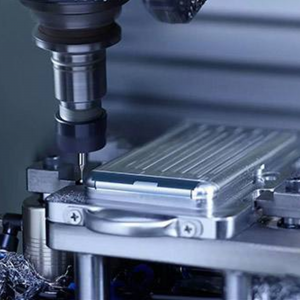
In the trial cutting of CNC machine tools, milling the oblique square four sided machining method is also an effective way of judgment, which can be used to evaluate the accuracy of two controllable axes in linear interpolation motion. During this trial cutting, the end mill used for precision machining is installed on the spindle of the machine tool, and the circular specimen placed on the workbench is milled. For small and medium-sized machine tools, circular specimens are generally selected within the range of ¥ 200 to ¥ 300. After completing milling, place the specimen on a roundness tester and measure the roundness of its machined surface.
By observing and analyzing the machining results, many important information about the accuracy and performance of machine tools can be obtained. If there are obvious milling cutter vibration patterns on the milled cylindrical surface, it reflects the unstable interpolation speed of the machine tool; If there is a significant elliptical error in the roundness produced by milling, it indicates that the gains of the two controllable axis systems for interpolation motion do not match; On a circular surface, if there are stop marks on the points where each controllable axis changes direction (i.e., in continuous cutting motion, if the feed motion stops at a certain position, the tool will form a small section of metal cutting marks on the machining surface), it indicates that the forward and reverse clearances of the axis have not been adjusted properly.
The accuracy judgment of CNC machine tools is a complex and difficult process, and some even require accurate evaluation after machining is completed. This is because the accuracy of machine tools is influenced by a combination of various factors, including the structural design of the machine tool, the manufacturing accuracy of components, assembly quality, the performance of control systems, and environmental conditions during the machining process.
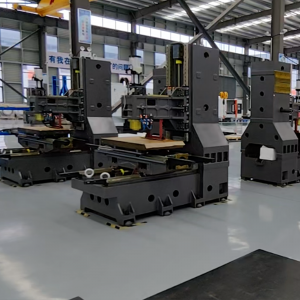
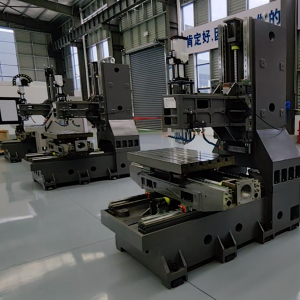
In terms of structural design of machine tools, a reasonable structural layout and rigid design can effectively reduce vibration and deformation during the machining process, thereby improving machining accuracy. For example, using high-strength bed materials, optimized column and crossbeam structures, etc., can help enhance the overall stability of the machine tool.
The manufacturing accuracy of components also plays a fundamental role in the accuracy of machine tools. The accuracy of key components such as ball screws, linear guides, and spindles directly determines the motion accuracy of each motion axis of the machine tool. High quality ball screws ensure precise linear motion, while high-precision linear guides provide smooth guidance.
Assembly quality is also an important factor affecting the accuracy of machine tools. In the assembly process of the machine tool, it is necessary to strictly control the parameters such as fitting accuracy, parallelism, and verticality between various components to ensure the accurate motion relationship between the moving parts of the machine tool during operation.
The performance of the control system is crucial for the accuracy control of machine tools. Advanced CNC systems can achieve more precise position control, speed control, and interpolation operations, thereby improving the machining accuracy of machine tools. Meanwhile, the error compensation function of the CNC system can provide real-time compensation for various errors of the machine tool, further improving machining accuracy.
The environmental conditions during the machining process can also have an impact on the accuracy of the machine tool. Changes in temperature and humidity may cause thermal expansion and contraction of machine tool components, thereby affecting machining accuracy. Therefore, in high-precision machining situations, it is usually necessary to strictly control the machining environment and maintain constant temperature and humidity.
In summary, the accuracy of CNC machine tools is a comprehensive indicator that is influenced by the interaction of numerous factors. When choosing a CNC machine tool, it is necessary to consider factors such as the type of machine tool, accuracy level, technical parameters, as well as the reputation and after-sales service of the manufacturer, based on the machining accuracy requirements of the parts. At the same time, during the use of the machine tool, regular accuracy testing and maintenance should be carried out to promptly identify and solve problems, ensuring that the machine tool always maintains good accuracy and providing reliable guarantees for the production of high-quality parts.
With the continuous progress of technology and the rapid development of manufacturing, the requirements for the accuracy of CNC machine tools are also constantly increasing. CNC machine tool manufacturers are constantly researching and innovating, adopting more advanced technologies and processes to improve the accuracy and performance of machine tools. At the same time, relevant industry standards and specifications are constantly being improved, providing a more scientific and unified basis for the accuracy evaluation and quality control of CNC machine tools.
In the future, CNC machine tools will develop towards higher precision, efficiency, and automation, providing stronger support for the transformation and upgrading of the manufacturing industry. For manufacturing enterprises, a deep understanding of the precision characteristics of CNC machine tools, reasonable selection and use of CNC machine tools, will be the key to improving product quality and enhancing market competitiveness.


